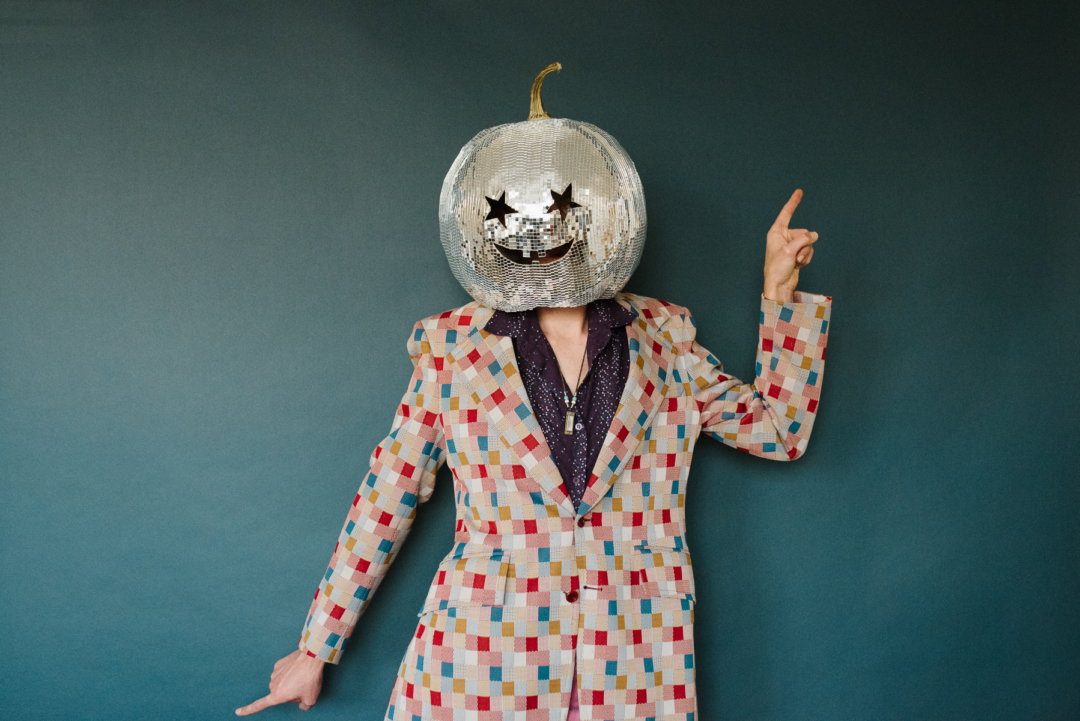
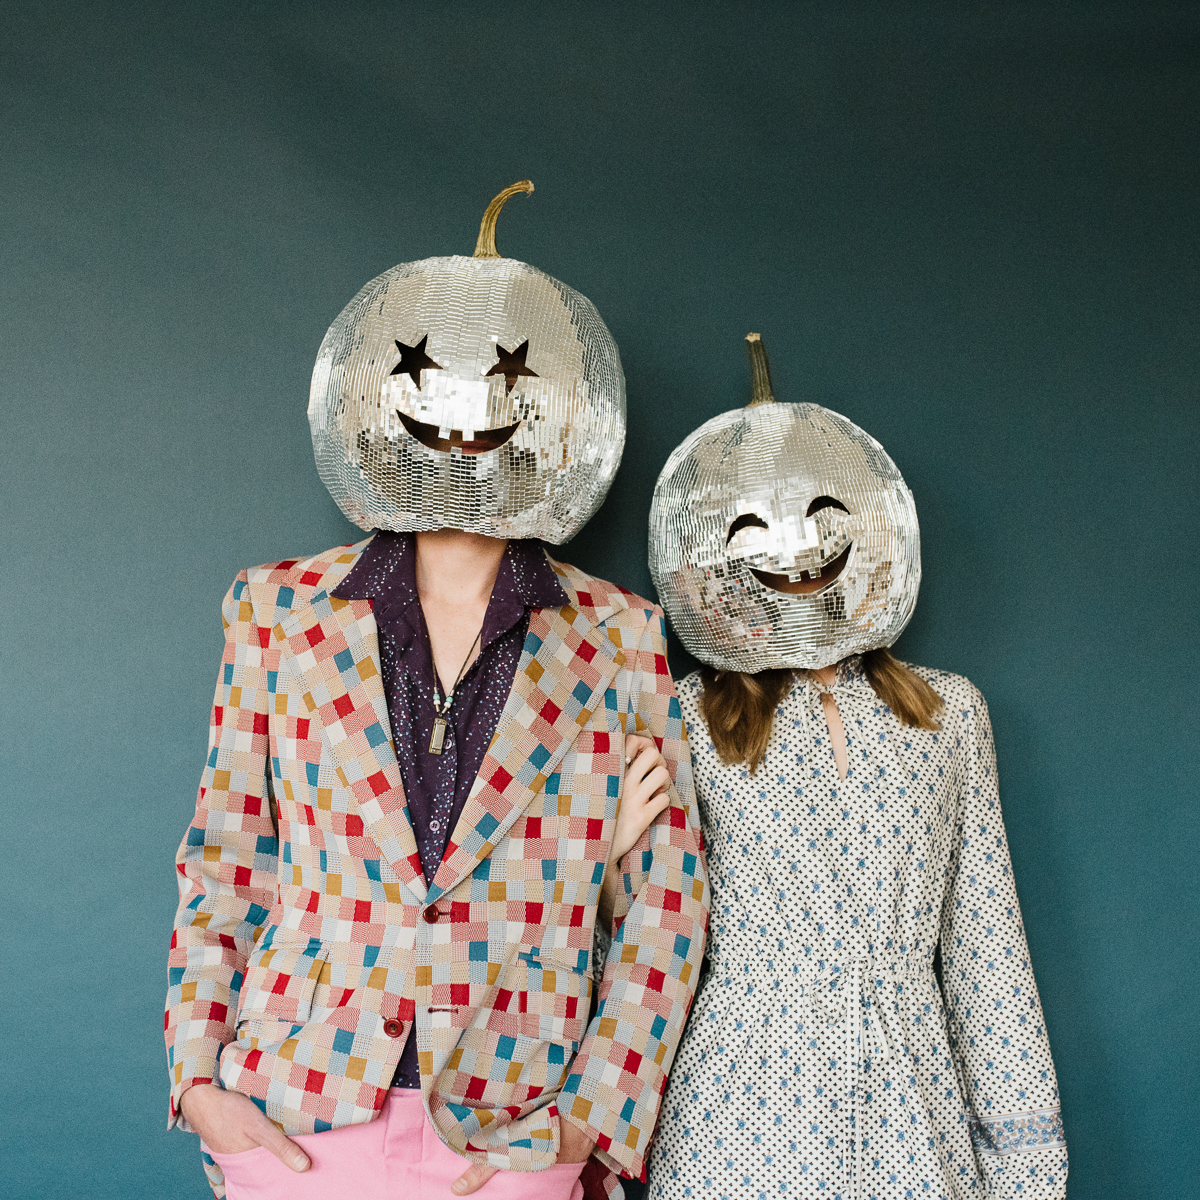
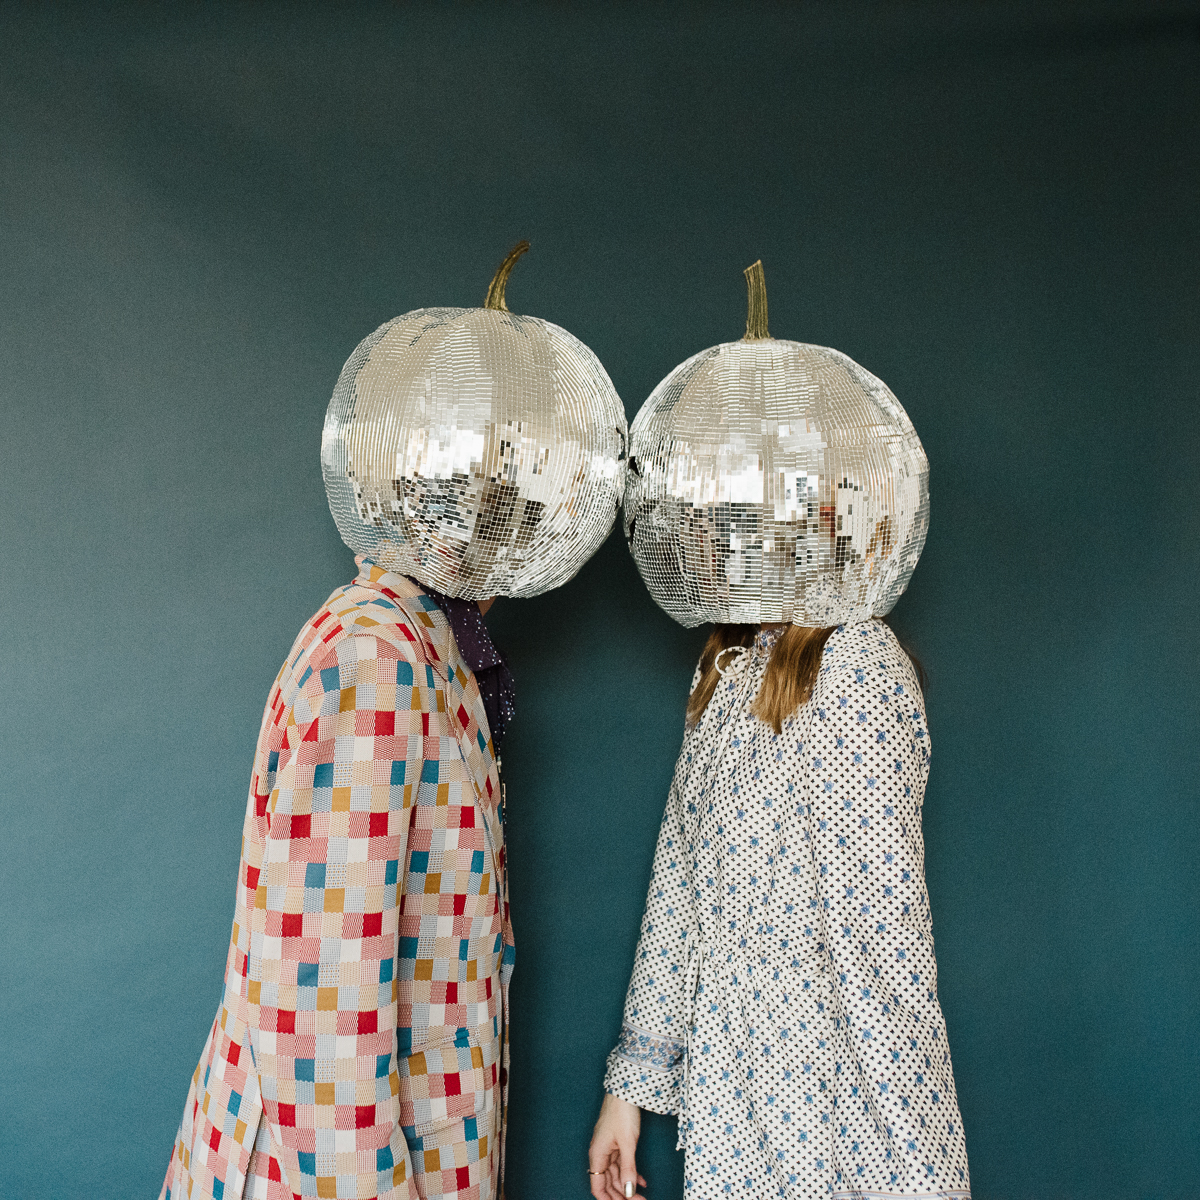
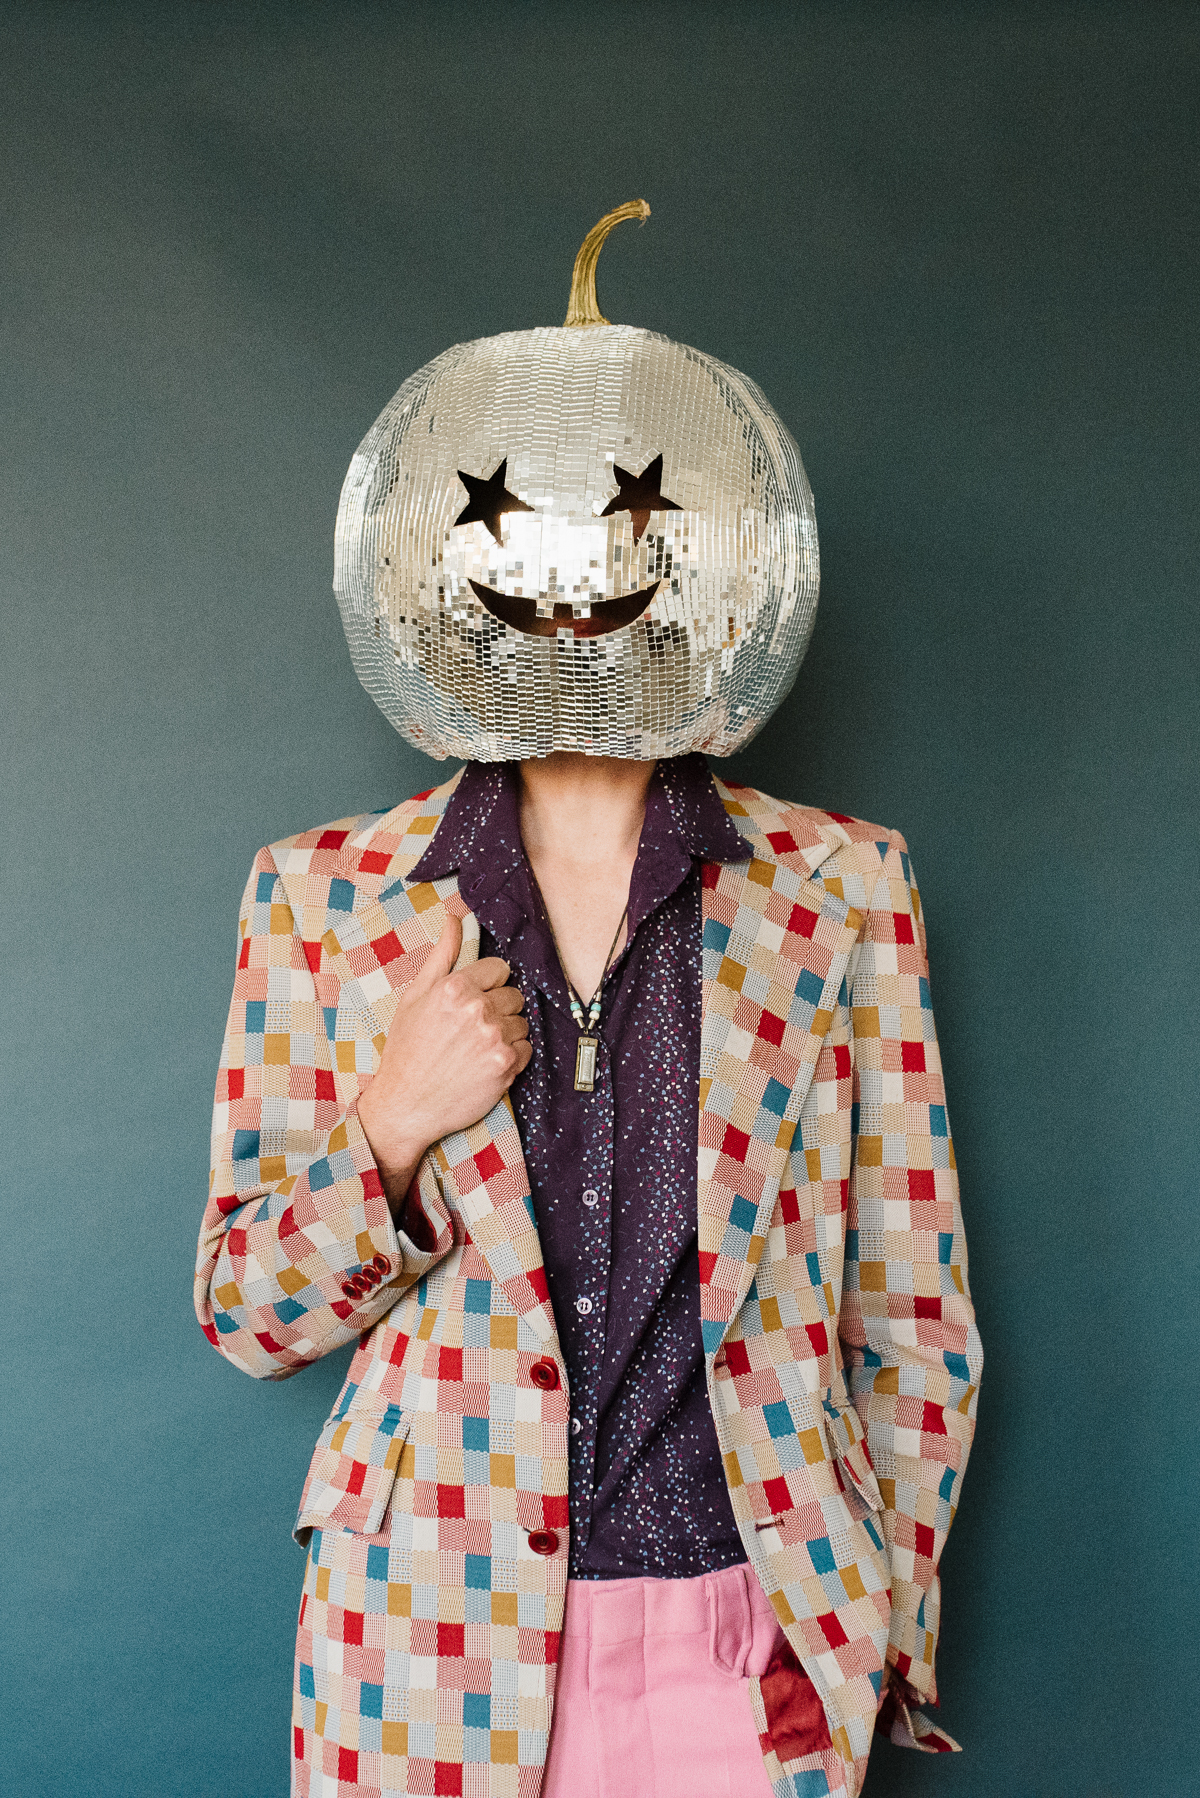
This project started when I saw this incredible photo shoot on Pinterest. My husband, Nate, and I were trying to decide what to be for Halloween, and this just looked so so fun. Nate even had a ’70s themed outfit, and I had a vintage ’70s dress ready to go.
The one snag was: We didn’t want to do this with actual pumpkins. Not fun to wear for any length of time, right? So we started brainstorming ways to create a base we could carve. Then I found this tutorial for paper mache pumpkins using a beach ball, and voilà.
 Here’s the basic process for one disco pumpkin head. This takes about five days because of the paper mache, so use a real pumpkin if you’re short on time!
- Blow up a 13–14 inch beach ball and tie string around it.
- Paper mache this “pumpkin” 3–4 times, waiting 24 hours between each layer so it can dry.
- Remove the beach ball.
- Cut a hole for your head at the bottom, plus a face on the front.
- Apply disco stickers all over.
- Hot-glue a dried pumpkin stem on top.
In-depth instructions below!
What you’ll need
- 13 or 14 inch beach ball (make sure you’re looking at the inflated size)
- String
- Paper mache paste (flour, water, salt)
- Newspaper or packaging paper, torn into 1- or 2-inch strips
- Pocket knife or other small knife
- Mini square glass mirror stickers, aka disco stickers (I used 1 ½ packs per pumpkin)
- Pumpkin stem ripped off of a real pumpkin (more on this in a bit)
 Step-by-step instructions
Prepare your beach ball.
Blow up your beach ball until it’s almost full. Tie string around it to create “ridges.” (It helps to follow the ball’s seams here.) Make sure the string is nice and tight.
 Gather your paper mache supplies.
The ratio for paper mache paste simple: 1 part flour to 2 parts water. You want it to be relatively runny. Whisk it together and add some salt to help prevent molding. Then, tear some newspaper or packing paper into 1- or 2-inch strips. (Tearing is better than cutting—it helps the paper blend better.)
 Paper mache the beach ball.
Make sure the nozzle of your beach ball is facing down before your start! Dip paper strips into the paste, squeezing off the excess, and then lay them flat on the surface of the ball. Make sure you overlap a little each time.
When you get to the bottom of the beach ball, turn it upside-down so that you can cover most of it. Leave a hole, but not a hole so big that your head can fit. You will trim the hole to fit later—you need it to be structurally sound for now.
Once layer #1 is done, set it somewhere to dry—I recommend a clothes drying rack—for a full 24 hours.
Repeat with layers #2 and #3. A fourth layer would be great for structure, but you can get away with three.
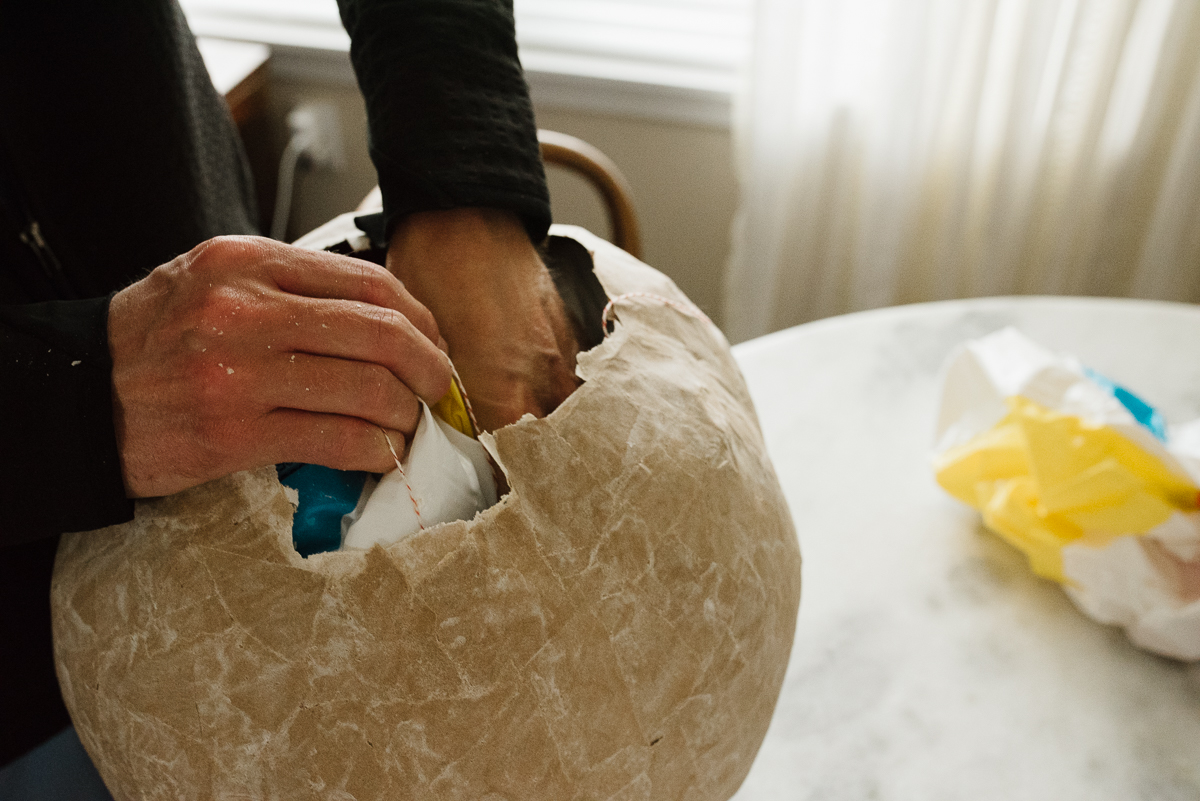
 Remove the beach ball.
Remember how I said to make sure the beach ball’s nozzle is on the bottom? Open the nozzle and squeeze air out of the ball until you can pull it out. The ball will come right off of the paper mache, I promise.
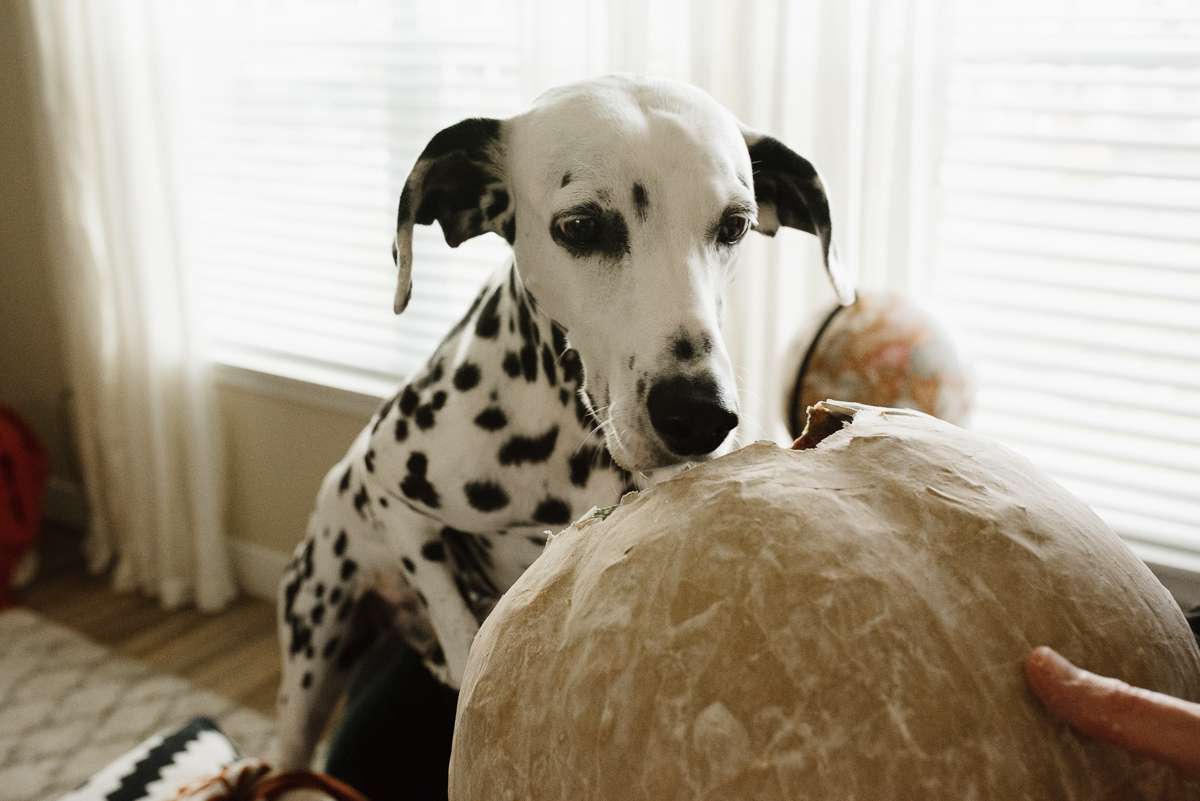
 Have a dog sniff your pumpkin to make sure it’s okay. (Kidding, but isn’t she the cutest?)
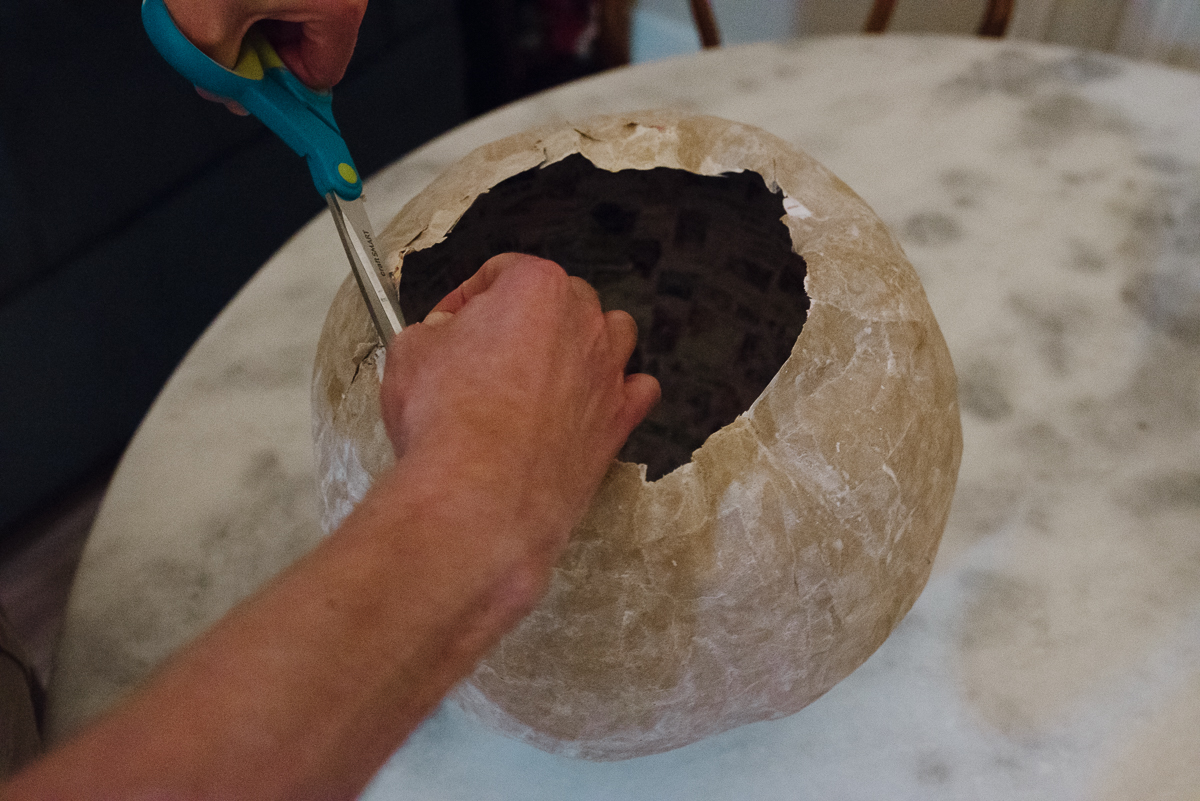
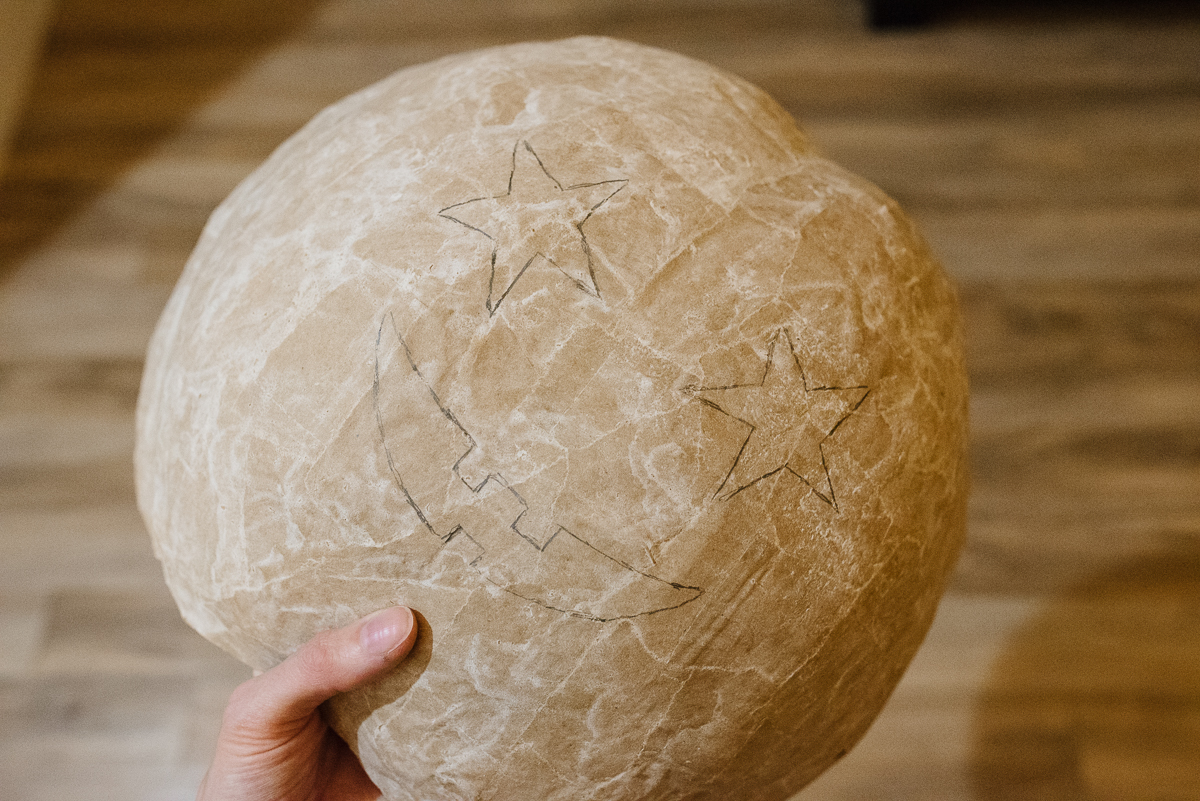
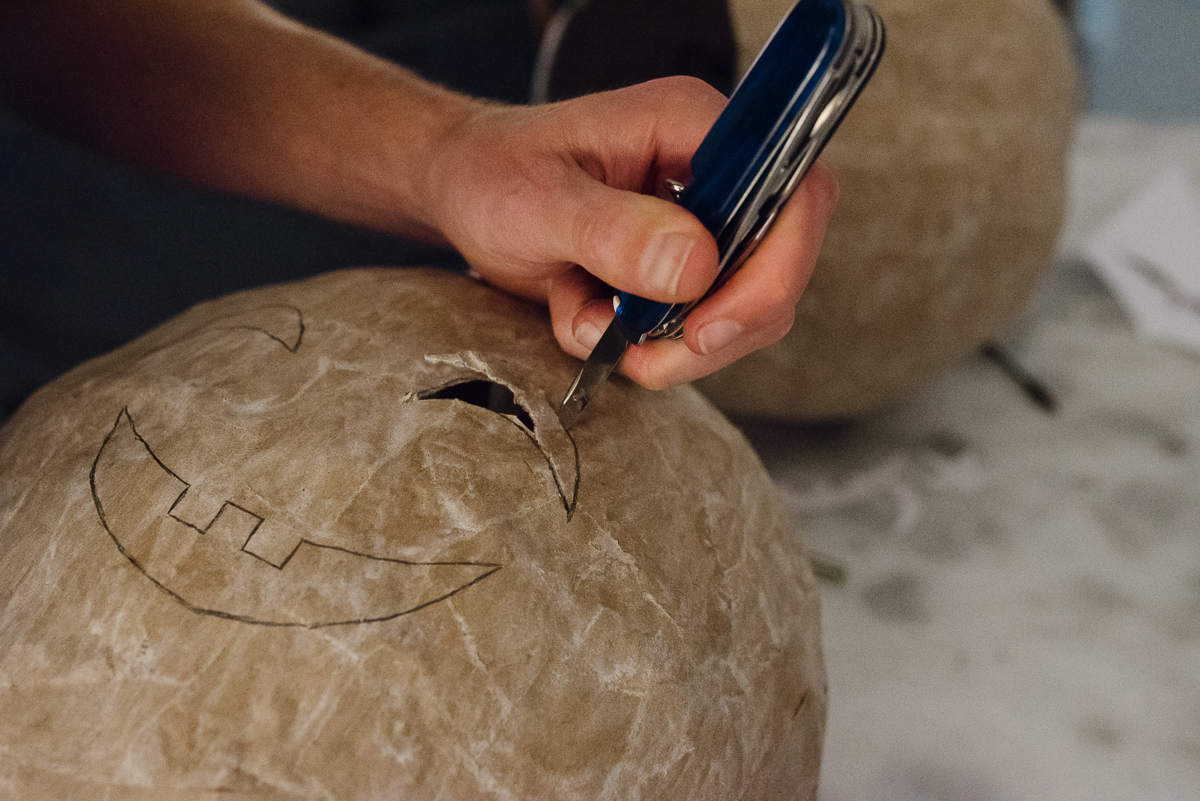
 Carve your pumpkin.
Start by cutting the bottom hole large enough to fit your head through. Scissors work great here, and I recommend just going little by little until your head fits.
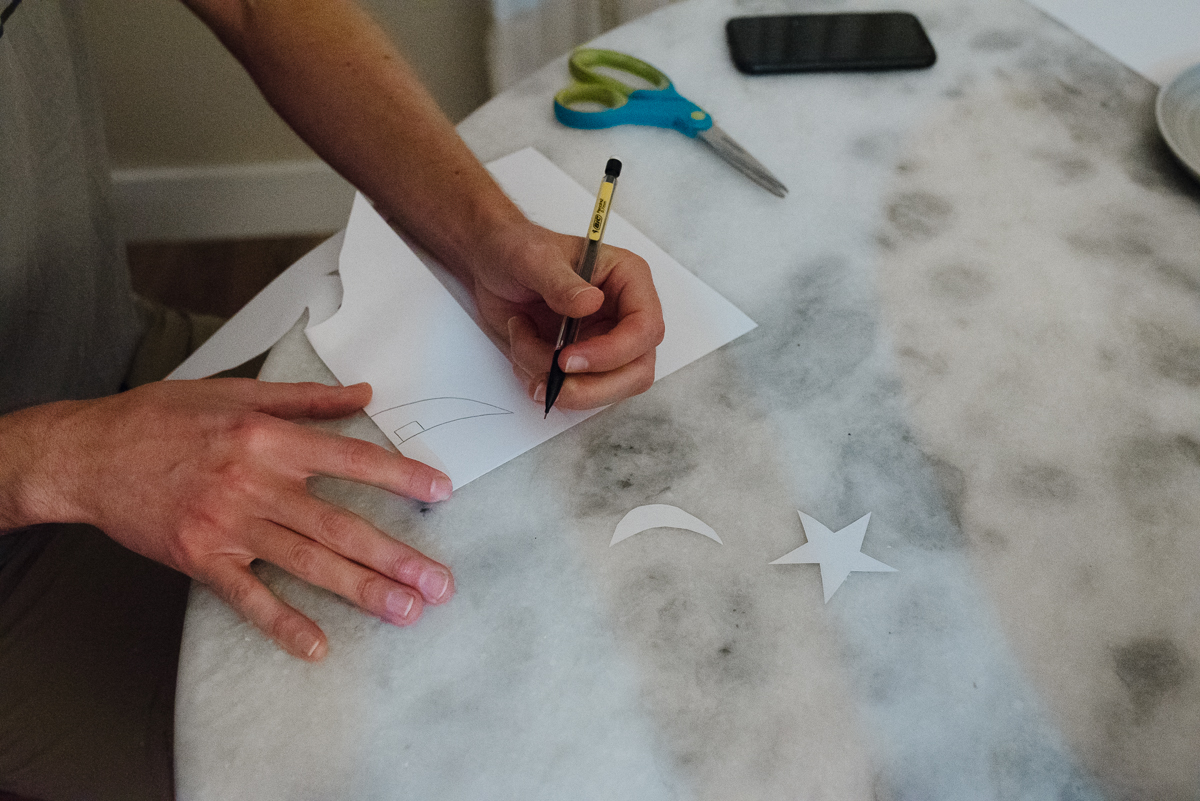
Now for the face! You can do whatever you want here. I loved the faces in that photo shoot, so I went with those. Nate drew the designs on a piece of paper, cut them out, and then traced them onto our pumpkins.
Tip: I recommend placing the face design right in the middle, regardless of where your eyes will be. This will have you looking out of the mouth, and your design will be nice and centered. Nate and I worried too much about getting the face’s eyes close to our own, and it had us carving the face lower than we should’ve.
We used a small pocket knife to cut the face out, and it was like butter. If you don’t have that, I imagine a smooth-edge paring knife would be the next best option. Just, for the love, be careful here.
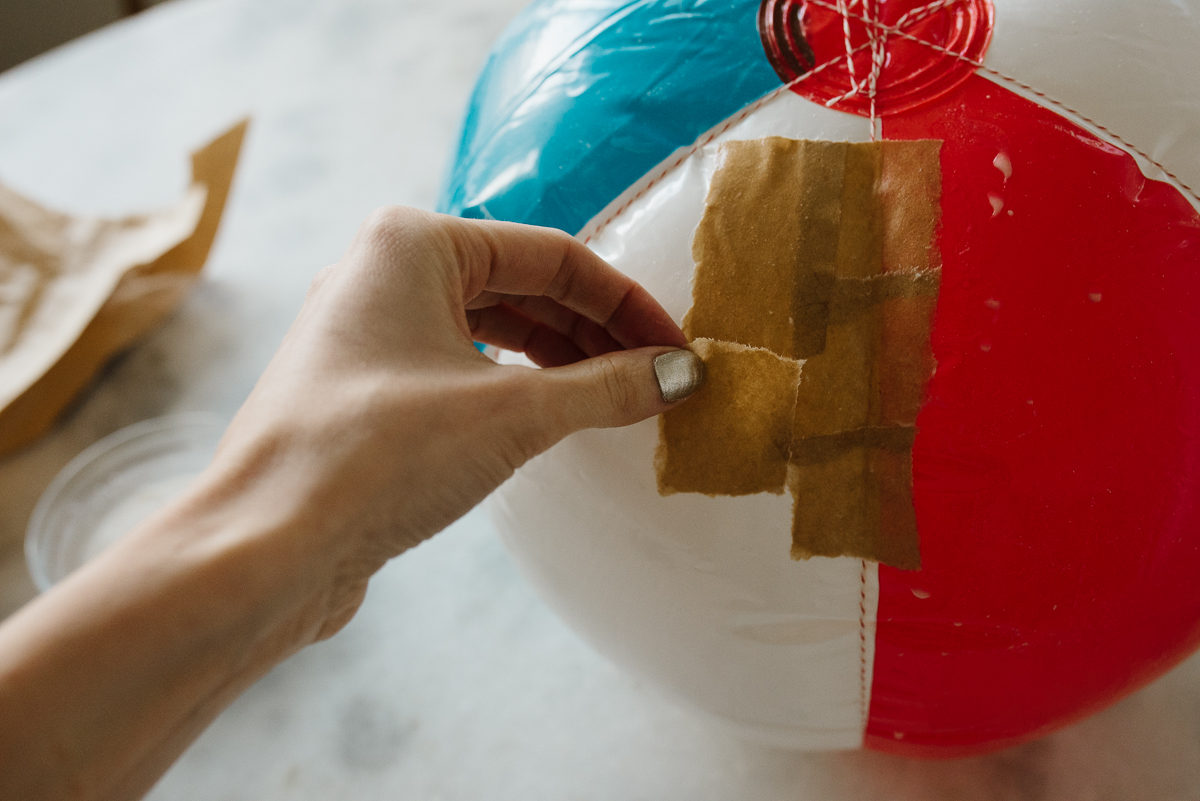
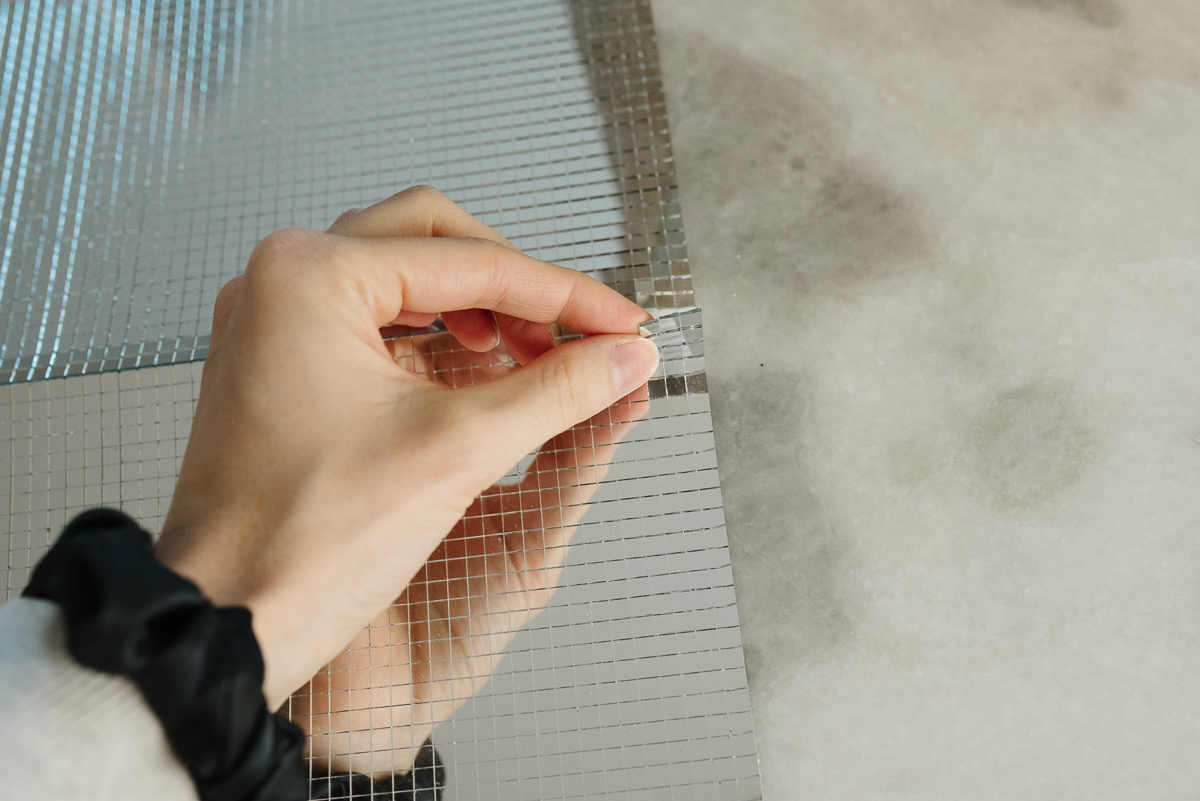
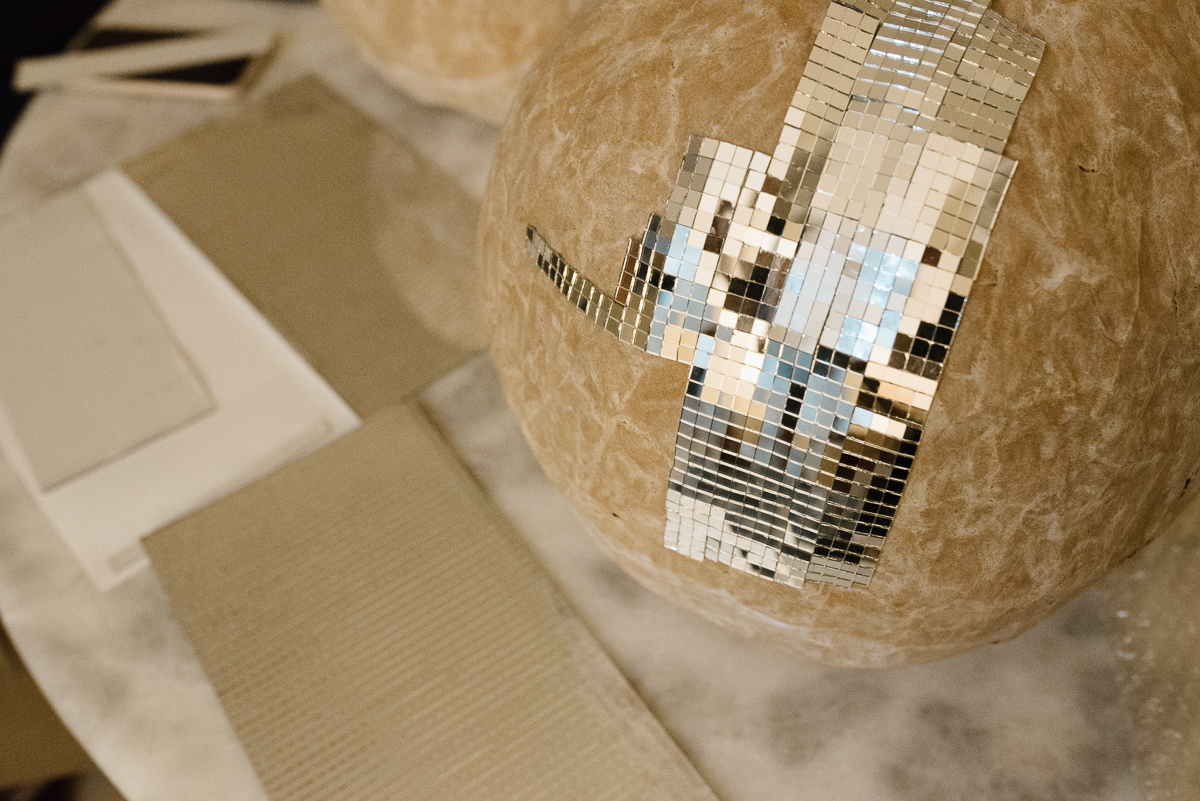
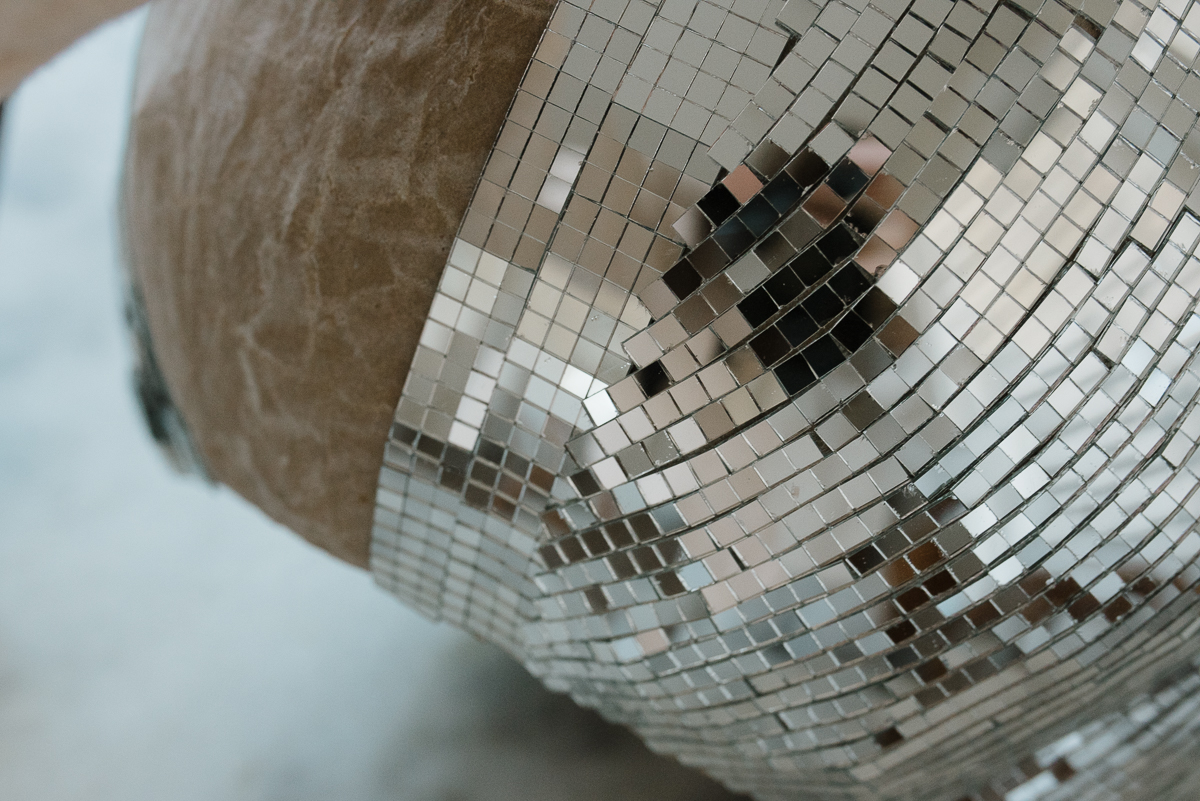
 Apply disco stickers all over.
Don’t worry. The stickers are tiny, but you don’t have to apply them one at a time! After doing this on two pumpkins, I have a few tips.
- Figure out which way your stickers will “tear.” They only tear into clean strips in one direction. (See my pic below for reference.)
- Start at the ridges. You can apply whole strands down the length of your pumpkin. I recommend starting at the ridges and applying strips on either side of each ridge to create multiple “prime meridians.” (Yay, geography.)
- Use strips 3–4 squares across for the bulk of your work. Anything wider is too wide to go on smoothly, but this width helps you make quick process.
- Don’t fuss about perfection. You’re putting square stickers on a round object. It inherently won’t be perfect. Once the pumpkin is fully covered, small bald spots and overlapping stickers will blend right in.
- The face is tricky—just muddle through it. This is wear you’ll be tearing smaller strips and getting more intricate. For instance, I tore strips 1 square across and applied them one at a time to create a smooth curve at the bottom of the mouth. The stars were tricky, and I left bald spots in places and overlapped stickers in others. Just do whatever creates the least amount of mess. You’ve got this.
- Taper as two areas come together. Remember how I said to start at the ridges? If you keep applying strips between those, the two areas will eventually meet. I found that the cleanest way to join two areas was to kind of taper as the areas started converging. Again, see my pics below.
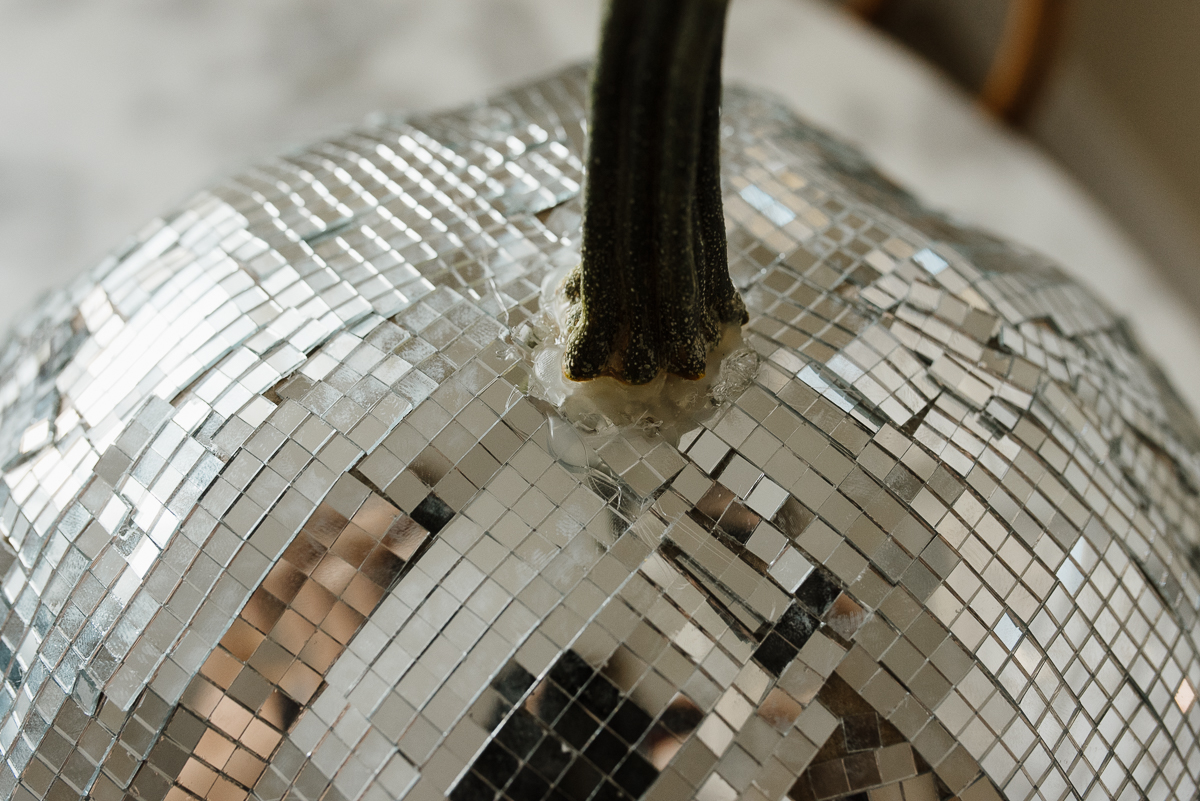
 Dry your pumpkin stem and hot-glue it on.
Rip a stem off of a pumpkin and scrape off any gunk. (I used a pie pumpkin and made purée after, yum.) Bake the stem in the oven at 200°F for 3 to 4 hours, until the stem is noticeably lighter in weight.
Hot-glue the stem to the top of the pumpkin. Use a lot of hot glue here so nothing wobbles!
And you’re done! It’s a labor of love to be sure, but I guarantee you’ll win the Halloween costume contest.
One more tip? If your pumpkin head doesn’t sit well with your shoulders, stick a baseball cap inside and wear it that way. That’s what Nate and I ended up doing!
No Comments