In taking photos for this blog, I’ve gotten a great deal of practice with food photography. It really has been one of my favorite skills to hone and develop. Not only does it help you to see beauty in the things of everyday life, but it also changes the way you approach presenting and serving the things you make. And while I’m far from being an expert in this regard (I’m still not completely satisfied with a great many of the photos on here), I do think I’ve discovered a few tips and practices that might prove to be incredibly useful for you as well. So. Without further ado…
1. Use natural light.
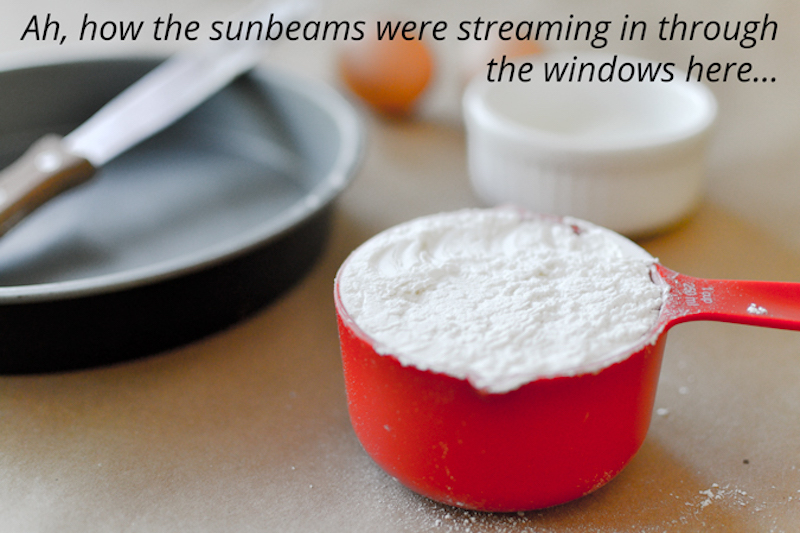
This is, in my opinion, the most important tip here. Not only is natural light the most flattering for your food, but also it allows you to use a pretty fast shutter speed—and that means sharper photos. Whenever I’m going to cook or bake something for a post, I specifically start making it at a time that will have beautiful sunlight streaming in through the windows somewhere in my home once I’m finished.
2. Don’t be afraid to step outside of the kitchen.
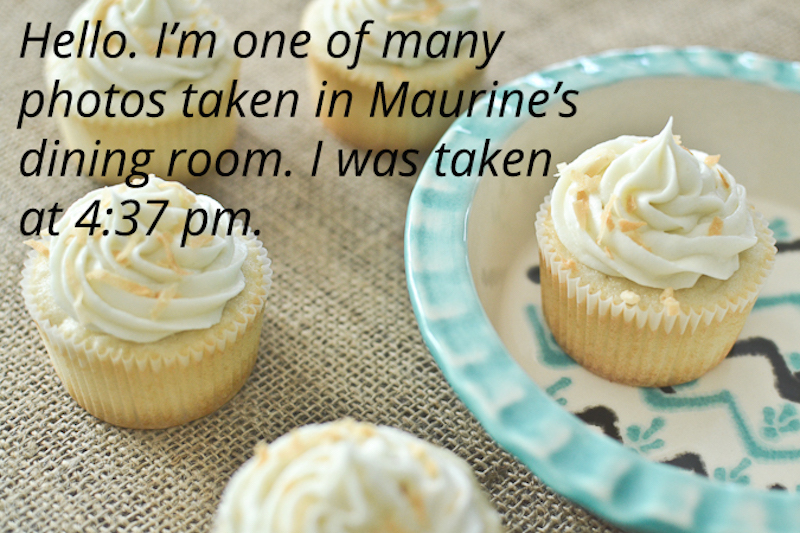
Ha, I don’t think I take any food photos in my kitchen. (This isn’t counting photos taken during the cooking or baking process, of course.) Observe how light flows through your home throughout the day. For example, I find that my (parents’) living room and dining room are great rooms to work in because they take in a lot of sunlight. I use the living room during the morning hours because the sun is on that side of the house then, and I use the dining room in the afternoon because the natural light has moved there by then.
 3. Become a collector of textiles.
This might sound kinda weird. But I’ve realized that instead of lamenting the fact that I don’t have a beautiful vintage-looking wooden table to use in my food photography, I can collect a variety of textiles to use on my flat surfaces. These can be anything—old sheets, fabric scraps, doilies, cloth napkins, a flat bedsheet…just get creative! Having a variety of textiles on hand gives you the freedom to choose exactly what kind of texture, coloring, etc. you want in your photos.
A roll of plain kraft paper is always good to have on hand too, by the way.
4. Work with complementing colors.
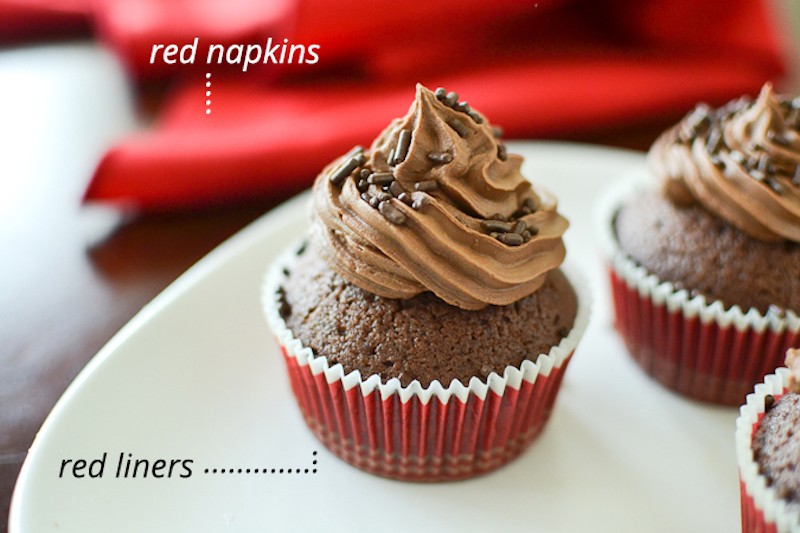
You should put a lot of thought into what colors you are going to pair up with the particular food item you are showcasing. The colors you choose will both determine the mood of your photos and bring out the best in your food. For example, I baked my chocolate cupcakes in red cupcake liners because I’ve found that red complements chocolate really well. Maybe it’s because chocolate has all these romantic associations with it? Plus, fun fact, did you know that red stimulates the appetite? (Blue kind of does the opposite, by the way. So maybe don’t use that color as much!)
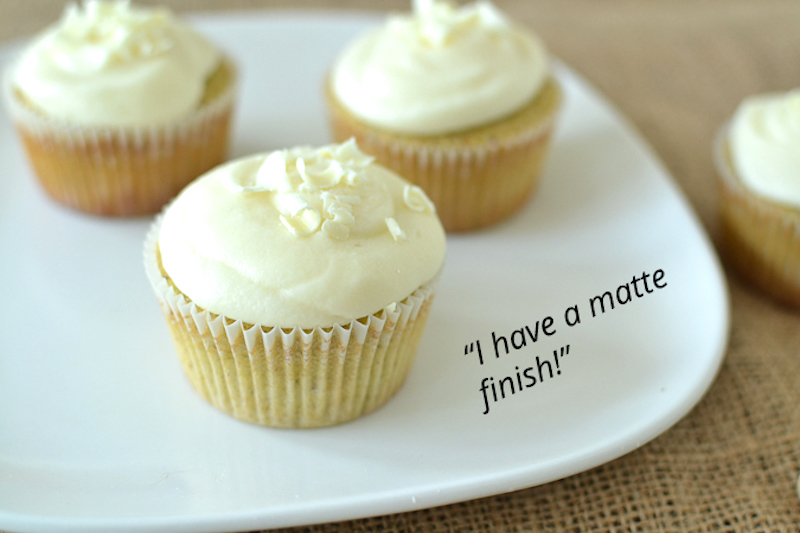
 5. Non-reflective serveware is the most photo-friendly.
Working around a blindingly white glare on a dish can be incredibly frustrating. I avoid this by using things that have more matte-like finishes. I do keep around a couple of plates with matte finishes solely for photo purposes, but most of the time I actually opt for bakeware. I have a few cake pans, cookie sheets, and porcelain pie dishes that work really well. And cast-iron skillets? They’re pretty much the most photogenic of all cooking utensils.
 6. Don’t forget props!
“Props” can mean anything from fun straws to cute, little spoons to a glass of milk in the background. As I’ve said before, get creative with this! Did you just make something with lemons? Put actual lemons in the photo. Trying to showcase a delicate cupcake? Try placing it in a teacup with a strand of pearls lying next to it. Even crumbs look great sprinkled next to a cookie that’s missing a bite or two from it.
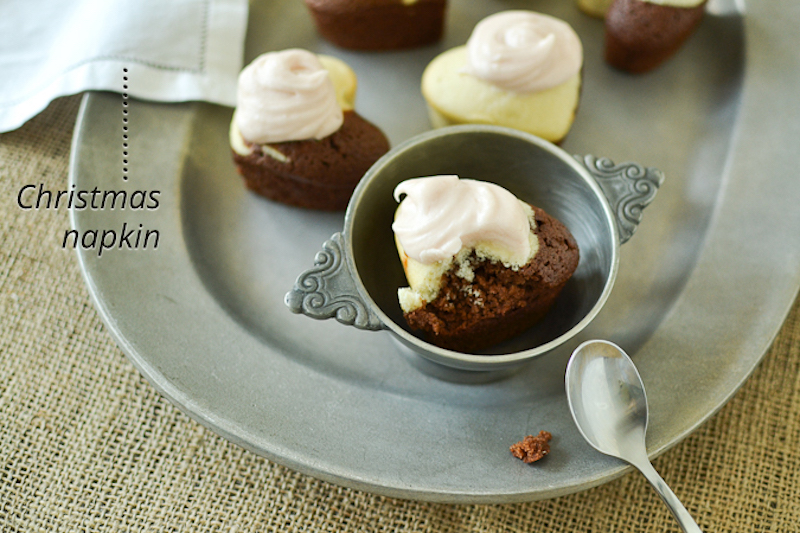
7. Remember—photos can lie about what the scene actually looked like. (Which is good!)
This one is hard to explain, but I think you’ll get what I mean as you gain practice. I tend to style my food to fit the camera frame exactly—nothing beyond that. This means that, for the majority of the time, you can bet that there isn’t a lot going on beyond the edges of that photo frame. What might appear to be a full plate of cookies, for example, is probably just a plate with a bunch of cookies on one side and photographed only on that side. I also remember a time when I needed a white linen napkin only to discover that the one I had on hand had a Christmas tree embroidered on the corner. The solution? Let that corner lie outside the photo frame. Bam. Done.
I guess to put it another way, remember that you can trick the viewer with how you frame the photo.
 8. On your camera—aim for a full exposure, wide aperture, and high shutter speed.
I use a Nikon D3100 with a 35mm f/1.8 prime lens for most of my food photography. That particular lens is great because it allows you to set your aperture (how wide the lens’ iris opens) pretty wide, which makes for a beautifully flattering blurred background. To set the wide aperture, I flip my camera to A-mode and turn the f-stop number down to something between 1.8 and 3.5. (Remember—the lower the f-stop number, the wider the aperture, the shallower the depth of field, and thus the blurrier the background. Heh, I know that’s a long sentence.)
Once I have the aperture set, I go into S-mode to raise the shutter speed. A wider aperture allows me to have a faster shutter speed because a wider aperture lets in more light at once. So the camera doesn’t have to be shooting as long to get the correct exposure (amount of light in the photo). A faster shutter speed—something like 1/320—is best because it makes for a sharper photo. (Sometimes I opt to use a tripod to make things even sharper.)
Then I flip the camera into manual mode to keep the aperture and shutter speed settings I just adjusted.
Finally, I raise the ISO (how sensitive the camera is to light) if I need to. Since the overall goal is a beautifully lit photo with a good, healthy exposure, raising the ISO might help me achieve the perfect amount of brightness if I already have the aperture and shutter speed set where I want them. And with that…I’m ready to shoot!


No Comments
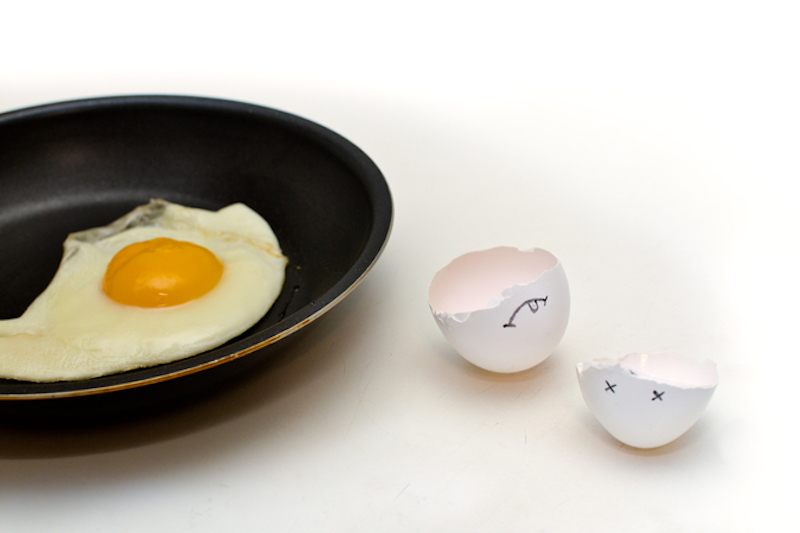
That egg picture looks familiar…as does the pan…and the counter…